Experiments with LCG
Introduction#
Pseudo-random number generators have always been my favorite thing to study as a pastime. A beautiful amalgam of information theory, cryptography and computing simply makes this a desirable candidate for study.
A while ago, I stumbled upon Linear Congruential generators. Such pragmatical utililty despite the functional simplicity is rare to find, especially in cryptography.
Seeing how LCGs aren’t a common topic discussed anywhere, I decided to do some experiments of my own. We’ll begin the article with a short overview. More enlightening references can be found in the Wikipedia article.
Overview#
Linear Congruential generators are pseudo-random number generators that use a recurrent piecewise linear equation defined as follows:
$$ X_{n+1} = (aX_n + c) \pmod{m} $$Where:
- $X$ is a sequence of pseudo-random values,
- $m$ is the modulus,
- $a$ is the multiplier,
- $c$ is the increment,
- $X_0$ is a seed.
The last four values are pre-defined constants. Each specifiction uses different values.
Note: Since the whole calculation is modulo $m$, the whole generator has a period. Meaning that a sequence of specific numbers will simply keep repeating after the generator has exhausted.
Experiments#
Since image manipulation is a favorite topic of mine to explore through both literature and code, I decided to explore LCGs through images. I experimented with two different scenarios. The reader is invited to read through them, and suggest more experimental ideas.
Randomized images#
Since LCGs generate pseudo-random numbers, I thought it would be interesting to explore how random images are generated. The images would be random in the sense that each pixel would have a randomized RGB components. Let’s take a brisk walk through the experiment.
Setup#
The code is available here: Link.
As a foundational activity, I set my sights on writing a simple but sufficient LCG implementation. I’d use no other language than Rust for anything in life. You can take a look at the implementation in lcg.rs.
The code contains two important functions implmented on the LCG data struct: init(), which initializes the generator with a seed, and next(), which yields the next random number. As said in the code, the constants are the same as those used for the glibc implementation. The choice of seed is left to us. I decided to use the current system time encoded as a UNIX timestamp as a seed, which is a fairly common practice.
The wrapper method, get_random_numbers yields a sequence of n random numbers. It’s used throughout the experiments.
pub fn get_random_numbers(n: i64) -> Vec<u64> {
    let mut random_nums: Vec<u64> = Vec::new();

    // Timestamp as a seed.
    let x0 = get_time_as_unix_timestamp().as_secs();

    let mut lcg: LCG = LCG::init(x0, A, C, M);

    for _ in 0..n {
        random_nums.push(lcg.next())
    }

    return random_nums;
}
The code above initializes a LCG and gets n random numbers from the generator. Simple enough.
Another technical aspect worth mentioning is the Netbpm image format. The image format is simple enough so that we can generate new images without dealing with file format intricacies. It is as follows:
P6 <WIDTH> <HEIGHT> <ALPHA>
......
......
......
where the dots are the pixel values each having RGB components.
Experiment#
I decided to carry out the experiment in two different ways.
- Color of each pixel is randomly picked from a palette of colors.
- Color of each pixel is truly randomized. This means that the color may
vary between
0x000000-0xFFFFFF.
Let’s dive into the first approach.
First we define the color palette. I picked up the Gruvbox color palette because why not.
const BRIGHT_RED :Color32       = 0xFF3449FB;
const BRIGHT_GREEN :Color32     = 0xFF26BBB8;
const BRIGHT_YELLOW:Color32     = 0xFF2FBDFA;
const BRIGHT_BLUE :Color32      = 0xFF98A583;
const BRIGHT_PURPLE:Color32     = 0xFF9B86D3;
const BRIGHT_AQUA :Color32      = 0xFF7CC08E;
const BRIGHT_ORANGE :Color32    = 0xFF1980FE;
const COLOR_BACKGROUND: Color32 = 0xFF181818;
Then, we generate the image as follows:
let random_nums = lcg::get_random_numbers(WIDTH * HEIGHT);

let mut j = 0;
for y in 0..HEIGHT as usize {
    for x in 0..WIDTH as usize {
        let color = color_palette[(random_nums[j as usize] % color_palette.len() as u64) as usize];
        image[y][x] = color;
        j += 1;
    }
}
First, we generate WIDTH * HEIGHT amount of random numbers. The image would contain WIDTH * HEIGHT amount of pixels so we need those many numbers.
Then, for every pixel of the image, we pick from the color palette a random color. The color is random as the random number is used as an index modulo the palette length.
Then, we simply assign that color to that pixel.
Once all the pixels have a value, we can write those pixels to an image file.
fn save_image_as_ppm(image: Image) -> std::io::Result<()> {
   let mut file = File::create(FILE_PATH)?;
   file.write_all(format!("P6\n{} {} 255\n", WIDTH, HEIGHT).as_bytes())?;

   let mut all_bytes: Vec<u8> = Vec::new();

   for y in 0..HEIGHT as usize {
       for x in 0..WIDTH as usize {
           let pixel: i64 = image[y][x];

           // Extract red component
           all_bytes.push(((pixel&0x0000FF) >> 8*0) as u8);

           // Extract green component
           all_bytes.push(((pixel&0x00FF00) >> 8*1) as u8);

           // Extract blue component
           all_bytes.push(((pixel&0xFF0000) >> 8*2) as u8);
       }
   }

   file.write_all(&all_bytes).unwrap();

   Ok(())
}
Notice that Netbpm uses reversed notation for the pixel components. The component order is BGR instead of RGB.
The result:
The output is a .ppm image which looks like this:
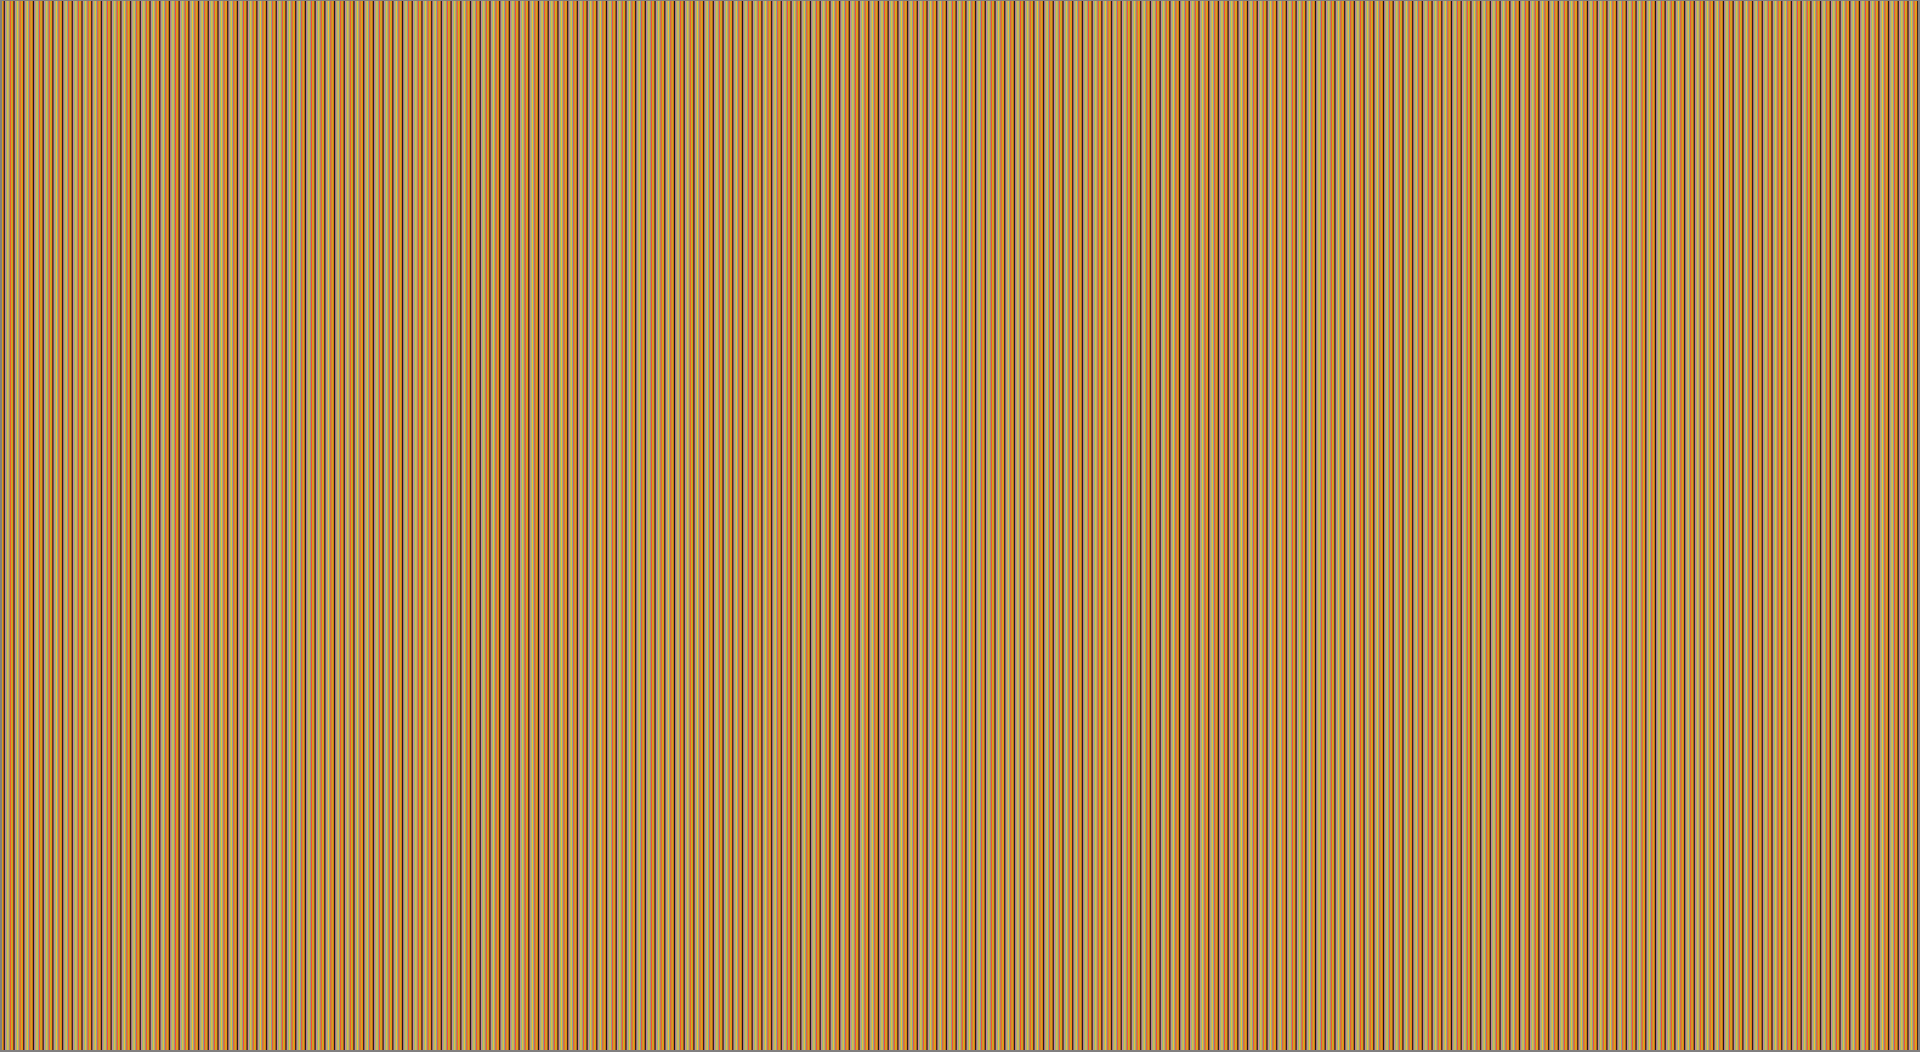
Interesting! Let’s zoom in.
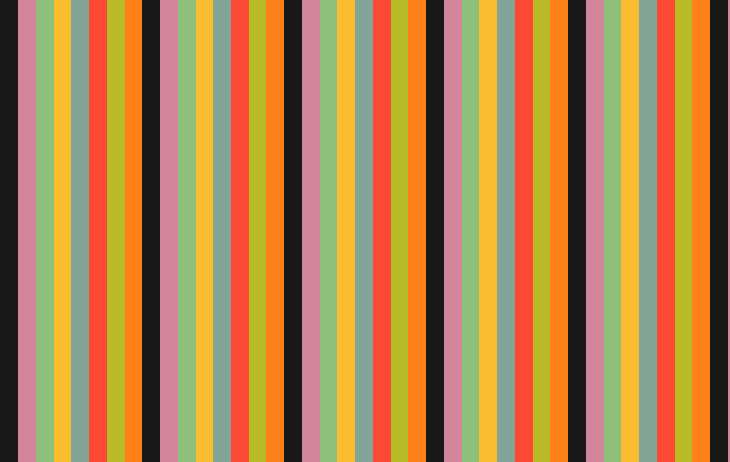
Not as random as thought it’d be, eh? We see that the colors repeat after a while. This probably means that the underlying number modulo color palette length is the same for some definite, short period.
Makes sense! Since we are doing modulo calculations again on the generated number, the period gets even shortened, and the pattern emerges.
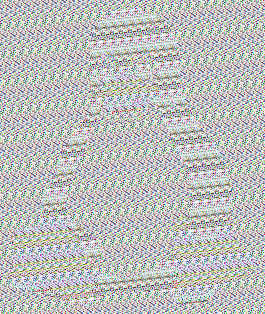
Second variant#
For the second variant of this experiment, we ditch the palette entirely. Let’s change our pixel generation logic a bit.
Instead of picking from a palette, we simply extract the lower 3 bytes of the randomly generated number. There’s a variation of this where we simply use the number modulo 0xFFFFFF.
let random_nums = lcg::get_random_numbers(WIDTH * HEIGHT);

let mut j = 0;
for y in 0..HEIGHT as usize {
    for x in 0..WIDTH as usize {
        // let color = (random_nums[j] % 0xFFFFFF) as i64;
        let color = (random_nums[j] & 0xFFFFFF) as i64;
        image[y][x] = color;
        j += 1;
    }
}
The result:
The output is a .ppm image which looks like this:

Just what we ordered! Noisy images are just what we needed and expected. Since the image is noisy, we may claim that LCG indeed generates random numbers successfully.
It is however, questionable if a pattern exists in the resulting image. Since we no longer do a modulo calculation in the logical AND variation, the pattern simply vanishes (as zooming would explain). But the regularly irregular columns in the image seem interesting.
Image encryption#
For my second experiment, I wanted to explore image encryption with LCGs. Since LCGs are pseudo-random number generators (PRNG), it is a good question to ask how they can be used for encryption.
Personally, I went the XOR route. Meaning that each pixel of the image is XORd with a random number. There are different strategies for this as well, as we will explore.
Setup#
The code is at lcg-enc repository.
The LCG implementation for this experiment is the same as the last one. No changes.
The test image I used is the famous AES-ECB Tux.

This image is often used as a proof of concept for testing encryption algorithms. For illustration, here’s how the image looks after encryption with AES-ECB.
A minor technical difference arises in this experiment, in the form of image formats. Since we now need to read images instead of just generating them, we would like to have a proper decoder. Fortunately, Rust’s handy image crate takes care of everything for us.
Experiment#
We’ll need to do the following things to encrypt the image.
1. Read all the pixels of the image to be encrypted.
2. Generate the WIDTH * HEIGHT amount of random numbers from the LCG.
3. XOR each pixel of the image with a number amongst the random numbers generated in step 2.
4. Write all encrypted pixels to a file and save the image.
Fortunately the image crate takes all the complexity of image formats away from us. We do each step as follows:
fn read_image() -> image::DynamicImage {
    return image::open(IMAGE_PATH).unwrap();
}
This reads, parses and returns a Image struct that we can use. The Image struct has several defined methods on it that we find useful.
Once read, we generate the random numbers:
let random_numbers: Vec<u64> = lcg::get_random_numbers(image.width() * image.height() as i64);
Then we encrypt the image.
fn generate_encrypted_image(image: DynamicImage, random_numbers: Vec<u64>) -> ImageBuffer<Rgba<u8>, Vec<u8>>{
    let mut enc_image: RgbaImage = ImageBuffer::new(image.width(), image.height());

    let mut j: usize = 0;
    for (x, y, enc_pixel) in enc_image.enumerate_pixels_mut() {
        let pixel = image.get_pixel(x, y);
        *enc_pixel = xor_pixel(pixel, random_numbers[j]);
        j += 1;
    }

    return enc_image;
}
We iterate through all the pixels of a new image buffer. The encrypted pixel is simply the xor of the pixel in the normal image and the random number.
The xor_pixel method simply returns as pixel encoded as RGBA. Note the XOR. We’ll let the alpha channel stay as it is for now.
fn xor_pixel(pixel: Rgba<u8>, random_number: u64) -> Rgba<u8> {
    image::Rgba([
                // Red
                pixel[0] ^ random_number as u8,
                // Blue
                pixel[1] ^ random_number as u8,
                // Green
                pixel[2] ^ random_number as u8,
                // Alpha
                255
    ])
}
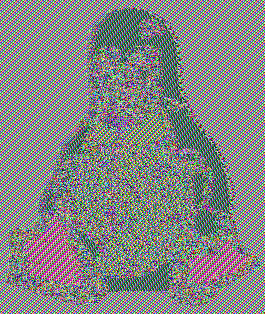
The result:
We get an encrypted PNG file.
![]()
Now that’s not bad, is it? You can still make out the penguin but the image itself is sufficiently encrypted.
A variation#
Now let’s alter our image encryption a bit and do a variant.
Here, instead of encrypting the whole pixel with the same value, we use different random numbers for each of the RGBA components.
Thus, we’ll first need 4 times the random numbers:
let random_numbers: Vec<u64> = lcg::get_random_numbers((image.width() * image.height() * 4) as i64);
Then we encrypt the image.
fn generate_encrypted_image(image: DynamicImage, random_numbers: Vec<u64>) -> ImageBuffer<Rgba<u8>, Vec<u8>>{
    let mut enc_image: RgbaImage = ImageBuffer::new(image.width(), image.height());

    let mut j: usize = 0;
    for (x, y, enc_pixel) in enc_image.enumerate_pixels_mut() {
        let pixel = image.get_pixel(x, y);
        *enc_pixel = xor_all_components_pixel(pixel, &random_numbers[j..j+4]);
        j += 1;
    }

    return enc_image;
}
The encryption procedure is same, save for the variation of the pixel XOR subroutine. We now pass a slice of 4 random numbers. The xor_all_components_pixel subroutine is like this:
fn xor_all_components_pixel(pixel: Rgba<u8>, random_numbers: &[u64]) -> Rgba<u8> {
    let encrypt_alpha: bool = false;
    image::Rgba([
                // Red
                pixel[0] ^ random_numbers[0] as u8,
                // Blue
                pixel[1] ^ random_numbers[1] as u8,
                // Green
                pixel[2] ^ random_numbers[2] as u8,
                // Alpha
                match encrypt_alpha {
                    true => 255 ^ random_numbers[3] as u8,
                    false => 255
                }
    ])
}
The code is pretty self-explanatory. encrypt_alpha is a switch that you can use to decide whether if you want to encrypt the alpha channel as well. Note that we use the entire slice.
The result:
We get an encrypted PNG file.
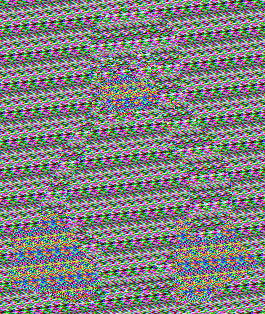
A good question to ask is if this variation offers us more encryption than the first one, where we just used the same number for the entire pixel. Personally, I didn’t notice much of a difference. Why? I do not know. Maybe information theory has an answer. Both approaches seem exactly similar if you look at it from a randomness perspective.
Here’s the same encryption method with the alpha channel encrypted.
Makes the penguin pop out even more. An interesting thing to note is that we lost the color palette of the original, unencrypted image here. This is actually better.
Conclusion#
There’s no conclusion. This was purely for recreational purposes.
$$ \blacksquare \blacksquare \blacksquare $$