Flare-on 9
Introduction⌗ ⌗
FLARE-On is a month-long annual CTF event by Mandiant. It focuses on Windows oriented reverse engineering and malware analysis.
It is one of my most favorite CTF events throughout the year. And it’s really, really hard. This year, I managed to solve 4 out of 11 challenges.
This blog post focuses on my writeups for the first two of these challenges and attempts to trace my train of thoughts.
Flaredle - Challenge 1⌗ ⌗
This is pretty much the easiest warm-up challenge.
We’re given a 7z archive which contains the files necessary for this challenge.
The 7z contains a typical collection of files used to run a website. It contains
index.html, style.css and two javascript files - script.js and words.js.
In a setup like this, I prefer setting up a local python server and playing around with the website first. We can setup a server in the same folder like this:
$ python -m http.server
This should start a server at the default port 8080. Cool!
Wordle and code review⌗ ⌗
The HTML page shows us a game setup.
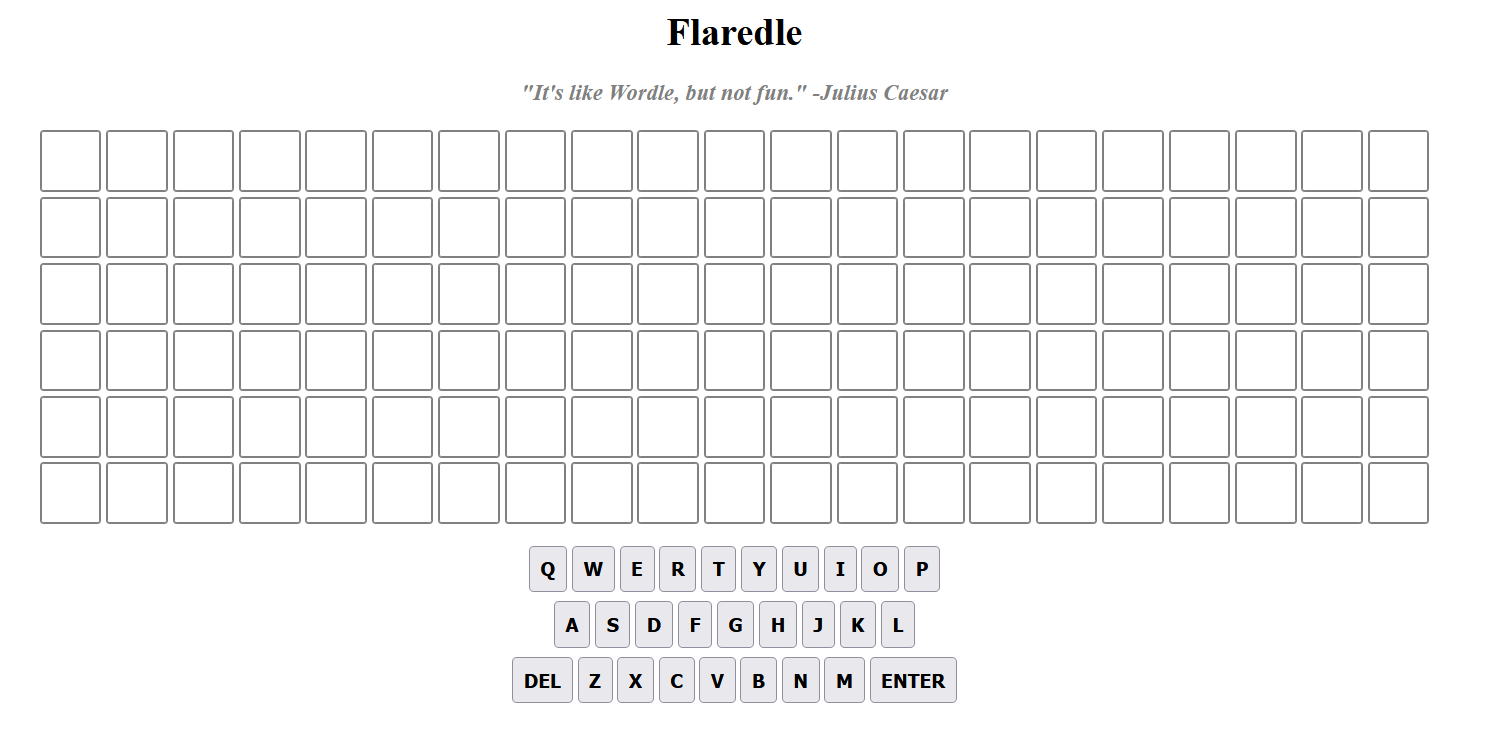
Many readers might recognize this setup to be the same of Wordle’s! Now the
challenge’s name makes sense. But this version looks much harder. This being
a CTF challenge, we’re not going to play the game. If we take a look at the
source, you’ll find that the HTML sources the script.js file. Let’s take a
look inside.
script.js⌗ ⌗
The file contains multiple functions that are typical to a Wordle-like game implementation (Bonus question: Do you know how Wordle works?). The opening lines look like this:
import { WORDS } from "./words.js";
const NUMBER_OF_GUESSES = 6;
const WORD_LENGTH = 21;
const CORRECT_GUESS = 57;
let guessesRemaining = NUMBER_OF_GUESSES;
let currentGuess = [];
let nextLetter = 0;
let rightGuessString = WORDS[CORRECT_GUESS];
We presumably import a set of words from the words.js file and set some
constants. It looks like we get 6 guesses at this. What’s interesting to us
is that the ‘correct’ guess is hardcoded and is the 57th word in the wordlist.
Once we enter a word and hit enter, we invoke the checkGuess function due
to this code:
document.addEventListener("keyup", (e) => {
<span style="color:#66d9ef">if</span> (<span style="color:#a6e22e">guessesRemaining</span> <span style="color:#f92672">===</span> <span style="color:#ae81ff">0</span>) {
<span style="color:#66d9ef">return</span>
}
<span style="color:#66d9ef">let</span> <span style="color:#a6e22e">pressedKey</span> <span style="color:#f92672">=</span> String(<span style="color:#a6e22e">e</span>.<span style="color:#a6e22e">key</span>)
<span style="color:#66d9ef">if</span> (<span style="color:#a6e22e">pressedKey</span> <span style="color:#f92672">===</span> <span style="color:#e6db74">"Backspace"</span> <span style="color:#f92672">&&</span> <span style="color:#a6e22e">nextLetter</span> <span style="color:#f92672">!==</span> <span style="color:#ae81ff">0</span>) {
<span style="color:#a6e22e">deleteLetter</span>()
<span style="color:#66d9ef">return</span>
}
<span style="color:#66d9ef">if</span> (<span style="color:#a6e22e">pressedKey</span> <span style="color:#f92672">===</span> <span style="color:#e6db74">"Enter"</span>) {
<span style="color:#a6e22e">checkGuess</span>()
<span style="color:#66d9ef">return</span>
}
<span style="color:#66d9ef">let</span> <span style="color:#a6e22e">found</span> <span style="color:#f92672">=</span> <span style="color:#a6e22e">pressedKey</span>.<span style="color:#a6e22e">match</span>(<span style="color:#e6db74">/[a-z]/gi</span>)
<span style="color:#66d9ef">if</span> (<span style="color:#f92672">!</span><span style="color:#a6e22e">found</span> <span style="color:#f92672">||</span> <span style="color:#a6e22e">found</span>.<span style="color:#a6e22e">length</span> <span style="color:#f92672">></span> <span style="color:#ae81ff">1</span>) {
<span style="color:#66d9ef">return</span>
} <span style="color:#66d9ef">else</span> {
<span style="color:#a6e22e">insertLetter</span>(<span style="color:#a6e22e">pressedKey</span>)
}
})
The checkGuess function
if (guessString === rightGuessString) {
		let flag = rightGuessString + '@flare-on.com';
		toastr.options.timeOut = 0;
		toastr.options.onclick = function() {alert(flag);}
        toastr.success('You guessed right! The flag is ' + flag);
		guessesRemaining = 0
		return
}
So we obtain the flag for this challenge if we guess the word correctly. The
words.js file contains a long list of words.
export const WORDS = ['acetylphenylhydrazine',
	'aerobacteriologically',
	'alkylbenzenesulfonate',
	'aminoacetophenetidine',
	'anatomicopathological',
	'anemometrographically',
	...
We check this file to locate the 58th word. It turns out to be
flareonisallaboutcats. Let’s try entering this word into Flaredle.
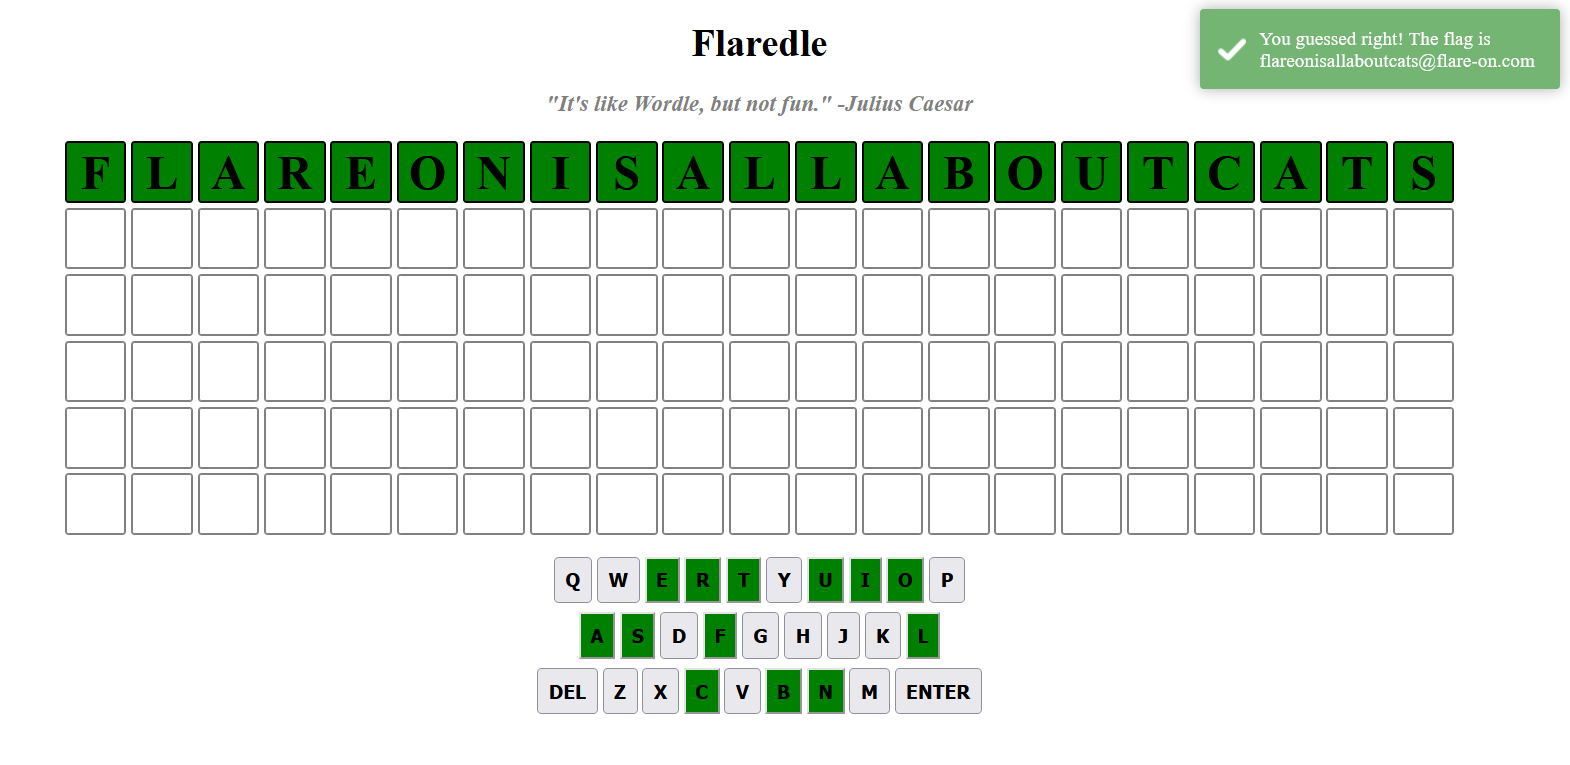
We get the flag!
$$ \boxed{\text{Flag: flareonisallaboutcats@flare-on.com}} $$
Again, this was a really easy challenge that involves taking a look into source code.
PixelPoker - Challenge 2⌗ ⌗
The difficulty of challenges grows rapidly from this challenge. Here, we encounter a proper 32-bit PE that we have to reverse. Let’s see.
Challenge: I said you wouldn’t win that last one. I lied. The last challenge was basically a captcha. Now the real work begins. Shall we play another game?
The challenge offers us a 7z again. Once we extract it, we’re left with 32-bit
executable named PixelPoker.exe and a readme file. The readme file tells us
that our goal is to click a correct pixel. Running this executable, we are
greeted with this screen.
![]()
The main canvas seems to be filled an array of random pixels, reminiscent of a TV’s static noise. The title bar holds two interesting things.
- Position of the cursor in x and y co-ordinates.
- Some sort of counter that keeps a count of how many clicks have been made on the canvas.
e.g. In the screenshot visible above, the cursor was positioned at $x=743$ and $y=198$.
Exhausting the attempts leaves us with a dialog.
![]()
Now to make some guesses based on the observations and my intuition:
- It’s certain that we have to click the correct the pixel out of all of the possible
combination of pixels on the canvas. The maximum size of canvas seems to be
(741, 641). This means that there are 474981 unique pixels to click. No way we’re going to find that manually. - It’s possible that the array of pixels is either completely random, created
at runtime. Or, it’s loaded from a Bitmap that’s present inside the binary. Such
bitmaps are typically loaded using Win32 API’s1
BitBltand friend functions. - To find out the correct pixel, there’s probably some sort of calculation that happens at runtime. We’ll need to reverse engineer the application to find it out.
Let’s get our hands dirty. I love Ghidra, so I’ll use that. I very much miss the expensive licensing costs of IDA these days.
Diving into the pixel soup⌗ ⌗
Whenever I analyze a binary, I like to check the strings first, as they give me a good initial impression of what I’m analyzing (or not). Looking into the strings, we get some indicators right off the bat.
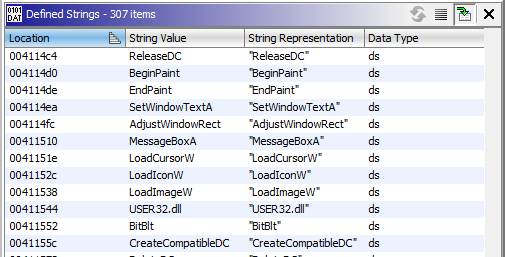
We see some typical functions such as BitBlt (aha!) and MessageBoxA. These
functions definitely tell me that I’m dealing with Bitmaps and Win32 GUI functions.
Tracing these functions into the imports of the application and examining their
cross references lands us in the main function.
In the main function, we see a bunch of match statements matching different
values. I was hoping to find something similar to this, since I had a hunch
that the application would listen for mouse button down event somewhere. Our
search is simplified by Ghidra’s decompilation and some very helpful strings.
After all of the boilerplate code that manages menus and Bitmap loading, we have
the stuff we really care about.
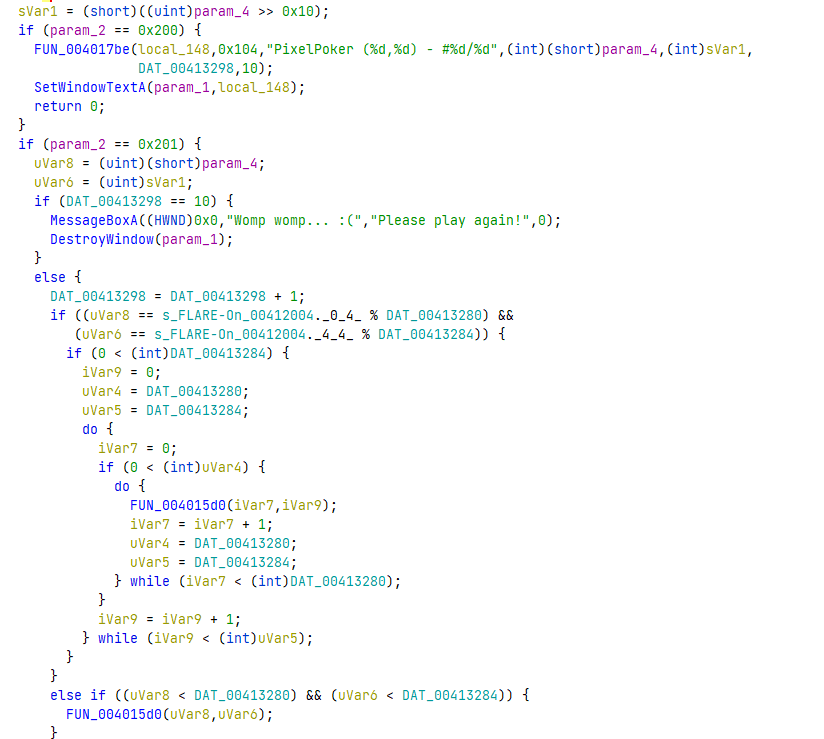
The first thing that immediately stands out is the Please play again message. Before that string, we even see a variable being compared to decimal value 10. This is probably our click counter!
The next thing that stands out is the comparisons of param_2 against different
hardcoded constants. These are probably some kind of macro constants. If we
look up those constants in the context of WIN32 API and events, it doesn’t take us very
long to find out that 0x200 is a WM_MOUSEMOVE constant and 0x201 is
a WM_LBUTTONDOWN (Mouse left button down) event. Just like we predicted! [Reference]
Further down else branch we see our click counter getting incremented. Then,
we do some kind of check against some values. Let’s understand what these values are.
uVar8 and uVar6 are the input X and Y co-ordinates that we clicked.
(Exercise to the reader: How did I arrive at that conclusion?).
The first argument to the modulo (%) operator is seems to be a constant. You’ll
see a Ghidra exclusive notation where, for example, the variable name ends with ._0_4_.
This just means that only the first four bytes of that data source are considered.
This roughly translates to $\text{MOV EAX, [s_FLARE-On_00412004]}$ in assembly (Add offset for the next 4 bytes).
The entire modulo operation looks something like this in assembly.
        00401472 a3 98 32        MOV        [DAT_00413298],EAX                               = ??
                 41 00
        00401477 a1 04 20        MOV        EAX,[s_FLARE-On_00412004]                        = "FLARE-On"
                 41 00
        0040147c 8b 35 80        MOV        ESI,dword ptr [DAT_00413280]                     = ??
                 32 41 00
        00401482 f7 f6           DIV        ESI
It turns out s_FLARE-On_00412004 is just a 8 byte string "FLARE-On". But since
these are the first 4 bytes LE, it translates to the constant 0x52414c46.
Further down, we see s_E-On_00412004+4 getting referenced. These are probably
the next 4 bytes LE which are 0x6e4f2d45 (LE: Little Endian).
Next, we care about what DAT_00413280 and DAT_00413284 is. I went into the
cross references of these data pointers to find out these are also used for
creating window and are provided as dimensions to CreateWindowExW which has
a signature as described here.

So these are the window height and width, which we know to be 741 and 641! This is also probably the check to find out the correct pixel.
It’s a common practice in reverse engineering to rename everything in the decompilation as we go along. The entire code, after renaming constants and variables looks something like this:
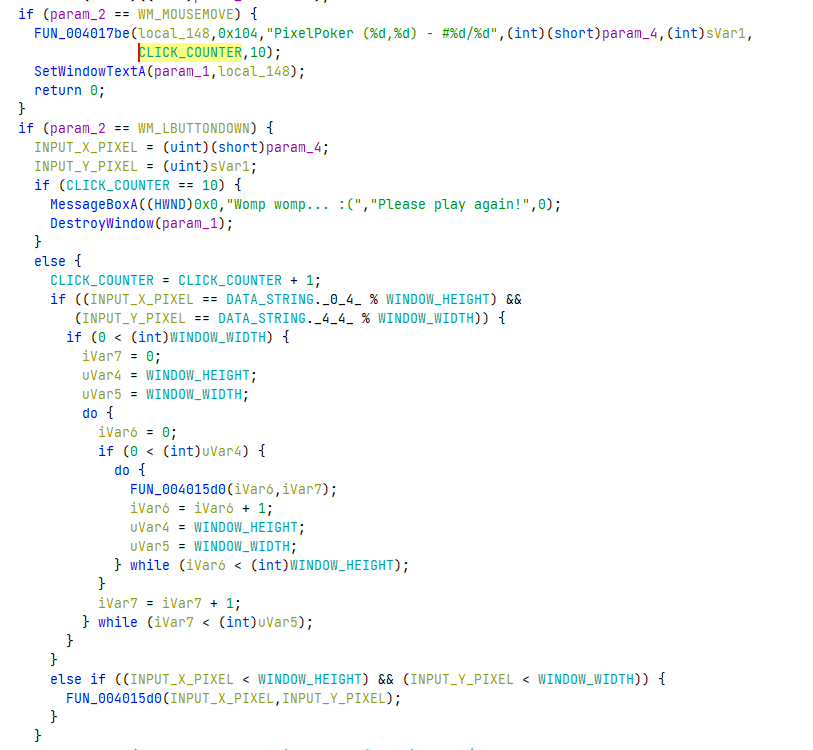
Much better!
Wrapping up⌗ ⌗
So we know that the actual check to see if clicked the correct pixel happens where the modulo operation happens. The two checks actually look like this.
if (INPUT_X_PIXEL == 0x52414c46 % 741) and (INPUT_Y_PIXEL == 0x6e4f2d45 % 641):
    # Success
We can actually calculate these values in a calculator.
>>> 0x52414C46 % 741
95
>>> 0x6E4F2D45 % 641
313
Once we click the pixel located at (95, 313), we succesfully get the flag.
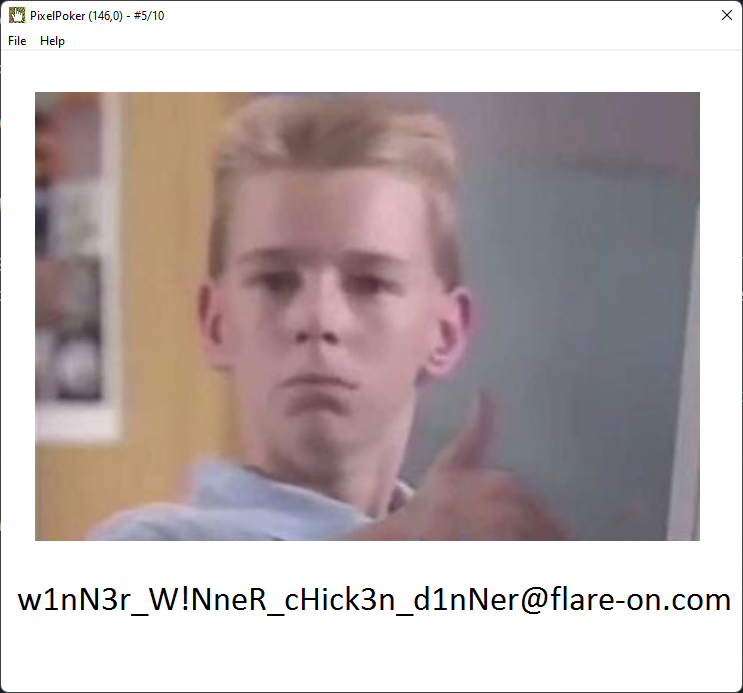
$$ \boxed{\text{Flag: w!nN3r_W!NneR_cHick3n_d1nNer@flare-on.com}} $$
$$ \blacksquare \blacksquare \blacksquare $$